Get in touch with Cenwan Machine Company


Updated November 2026 · by CYH · Reviewed by the Zhejiang Chengwang Intelligent Packaging Equipment (Cenwan Machine) Technical Team
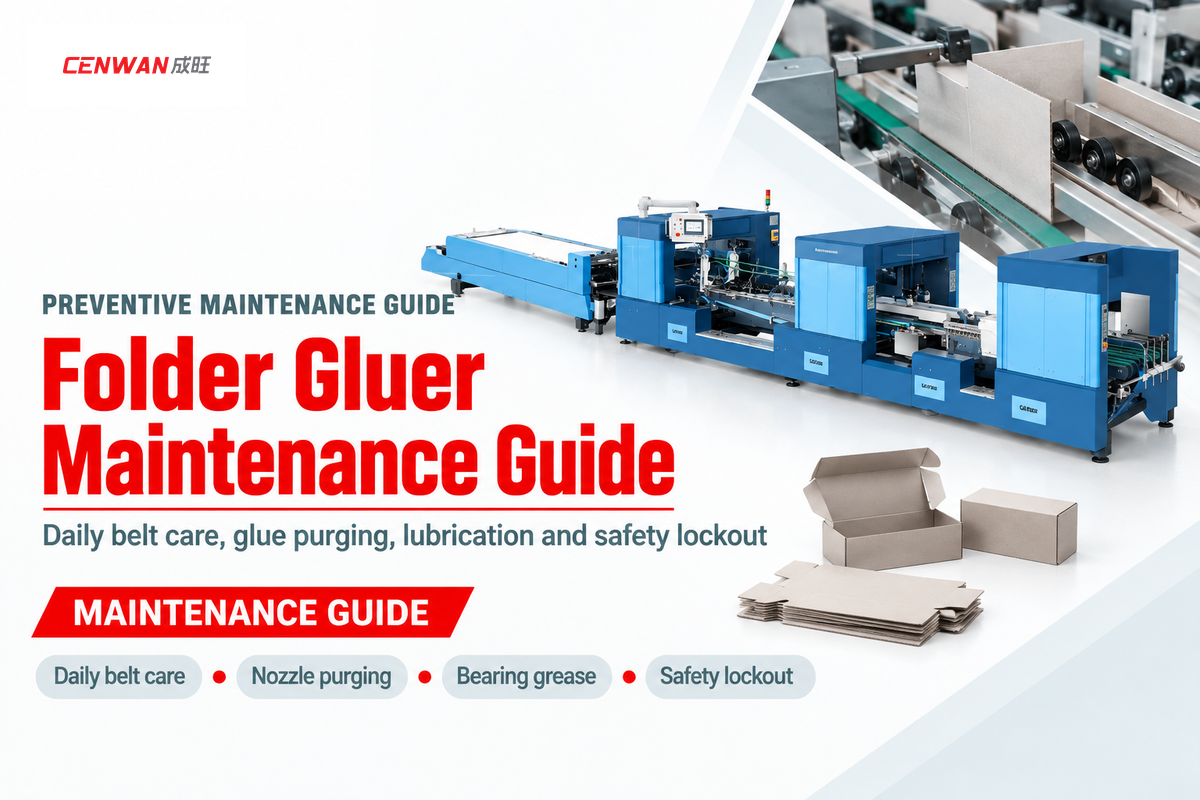
The folder gluer Maintenance Guide is a shop-floor engineering schedule for the carton converting lines. The guide structures operator-level cleaning and checks for filter and tension, as well as other periodic bearing inspections and hot-melt filter swaps, and locked-out overhauls. Following this tiered structure at all seven converting stations prevents unplanned downtime, stops belt glazing, and keeps folded carton seams square at 180 to 400 m/min.
Running an automatic folder gluer machine until a feeder belt slips or an extrusion valve clogs ruins shift productivity. A NIST manufacturing machinery maintenance survey examined various maintenance strategies across a range of industrial facilities. Plants with a preventive and predictive strategy recorded 52.7% less unplanned downtime and 78.5% less product defects compared to reactive plants. Below, we show maintenance checklists, belt cleaning chemistry, cold-glue and hot-melt purges, lubrication and care of optical sensors, and root cause troubleshooting.
Quick Specs: Folder Gluer Preventive Maintenance Baseline
| Shift & Weekly Inspection Cadence | ~10 min daily operator walk-around and shift-end glue purge; ~30 min weekly checks; ~1 hr monthly and ~2 hr quarterly technician audits. |
| Belt & Bearing Service Intervals | 120 operating hours for belt tension, wear, and bearing inspection (BOBST baseline). ISO 2230:2026 dark, cool storage for spare rubber belts. |
| Adhesive & Optical Sensor Thresholds | 500 operating hours for inline hot-melt filter replacement. 25 ± 5 mm working distance and 1 × 1 mm dot detection at 20 kHz on Baumer GDX 1000 cold-glue sensors. |
| Pneumatic & Electrical Ratings | 6 bar air pressure at 10 m³/h consumption; 13.5–25.5 kW (CW-G, with 13.5 kW on CW-G-650PC and 21.5–25.5 kW on larger models) and 22–25 kW (CW-W) servo drive systems. |
| Regulatory & Safety Frameworks | OSHA 29 CFR 1910.147 stored-energy lockout/tagout, US FDA 21 CFR 175.105 food-packaging adhesive cleanliness, and CE Directive 2006/42/EC. |
Why Does Structured Folder Gluer Maintenance Prevent Costly Converting Downtime?
Implementing structured folder gluer maintenance decreases unplanned downtime by 52.7% and reduces product defects by 78.5%, according to benchmarks set by the NIST manufacturing machinery survey. Failure to maintain converting lines increases order-switch time and increases crash-lock scrap due to paper dust, cured glue and belt glazing.
How Do the Seven Folder Gluer Sections Degrade Without Preventive Care?
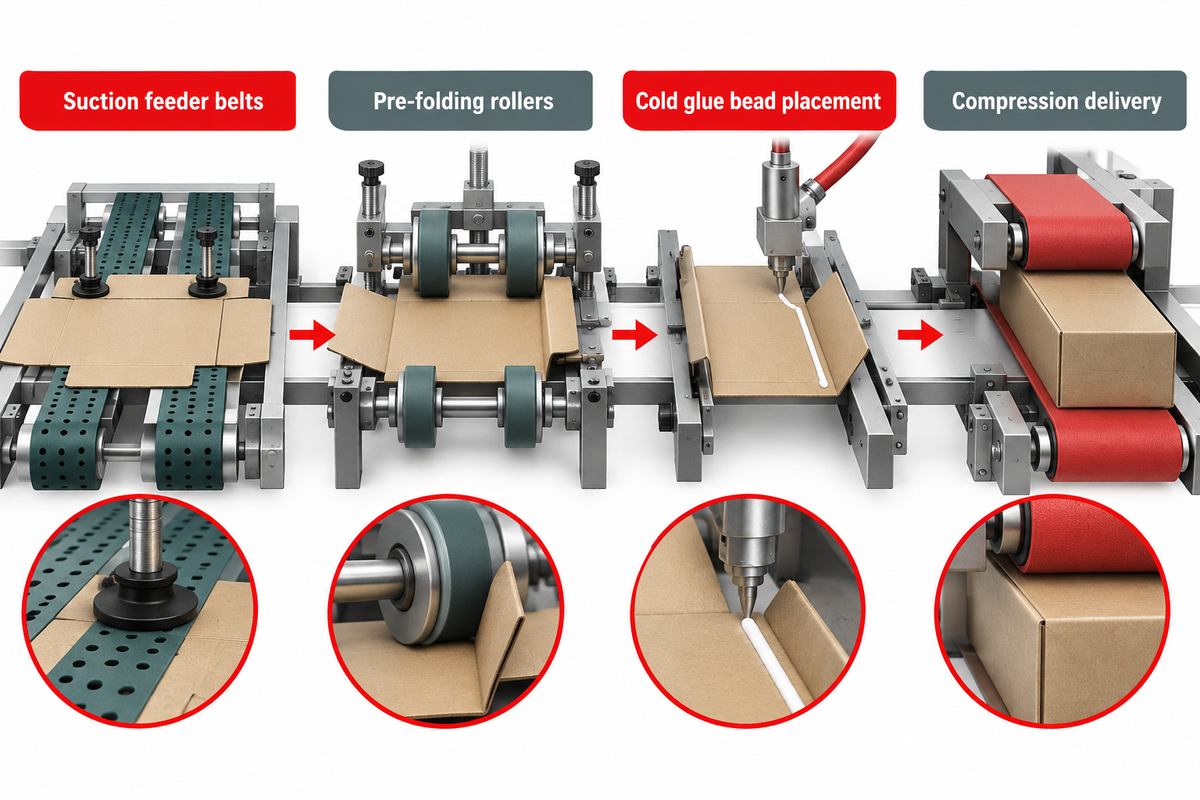
The effects of neglecting care and maintenance on conversion lines are evident in the seven sections. Suction belts become glazed with dust from clay, and pre-folding knives become grooved. Crash-lock hooks lose their spring, and glue nozzles clog. Downstream effects include fouled transfer encoders, compression aprons losing pressure, and uneven belt stretching.
Each carton gluer machine functions as a synchronized mechanical chain. Using the TAPPI corrugated joint testing framework (TAPPI T 840 om-10 and T 813), the critical factor that influences bond integrity is the sequential feeding, creasing, application of adhesive, folding, and compression delivery. As a blank passes through these stations at speeds of 180 to 400 meters per minute, a defect in one station causes major problems downstream.
Consider how mechanical neglect cascades through packaging production. When paper dust coats the feeding section belts, blanks enter the pre-folding rollers late. That miss feed delays the cold glue bead, placing it at the crease line. Inside the folding section, excess glue squeezes onto the carrier belts and transfers dried glue onto subsequent finished boxes.
Let’s say a converting line cranks out 60,000 crash-lock cartons in a shift across two order changes. Using Cenwan’s published legacy pain-point baseline of two-hour change times and an 8% reject rate on crash-lock boxes, two reactive setups consume 240 minutes of a 480-minute shift. An 8% defect rate on crash-lock boxes scraps 4,800 cartons in a shift. If preventive and predictive care cuts defects by 78.5%, as the NIST benchmark reports, scrap falls from 4,800 to 1,032 cartons per shift. That’s a significant reduction from the assumed 60,000 crash-lock boxes produced. Actual savings vary with board cost and the skill of the operators.
The same NIST survey reveals that further reductions in unplanned stops can be achieved by the application of predictive condition monitoring. Similarly, applying these practical maintenance tips supports effective maintenance across all parts of the machine, protects machine lifespan, and avoids costly repairs.
What Should a Daily, Weekly, Monthly, and Annual Folder Gluer Maintenance Schedule Include?
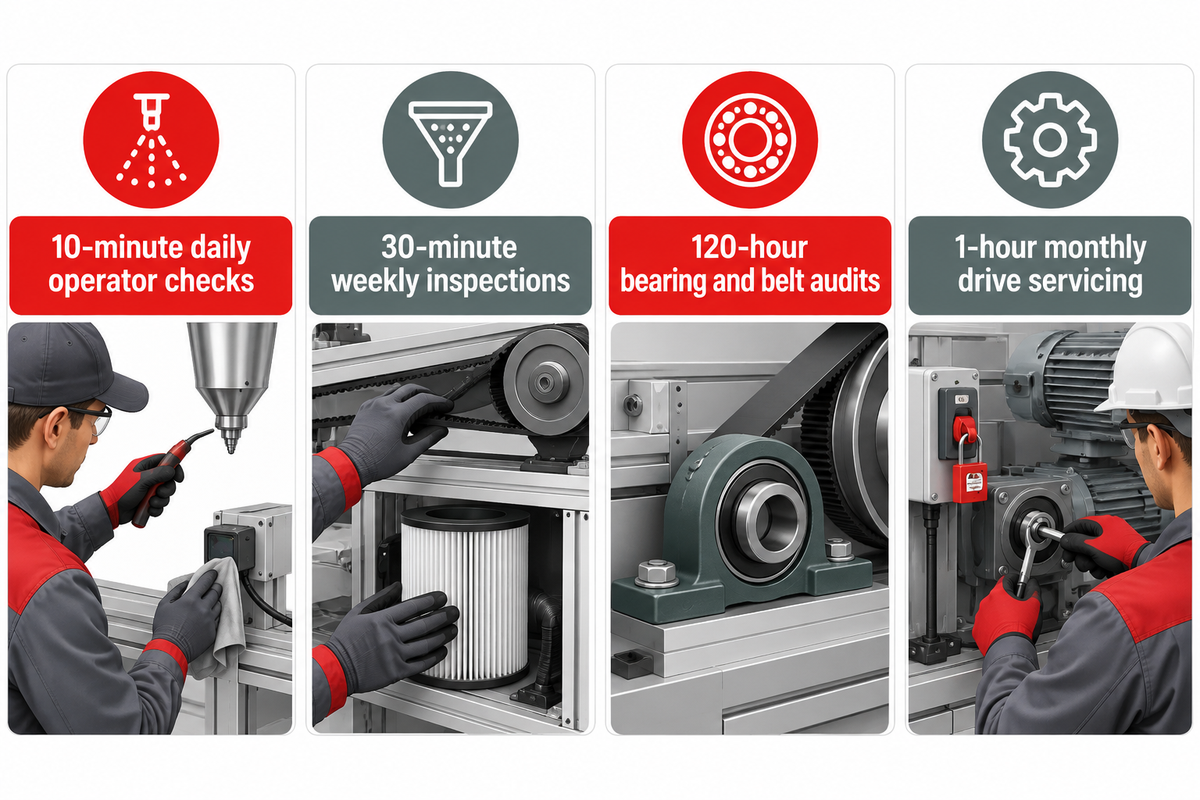
A full schedule consists of five time-tiered levels, as well as 500-hour and quarterly audits. It combines 10-minute daily operator checks, 30-minute weekly tension and filter inspections, 120-hour bearing and belt audits, 1-hour monthly drive servicing, and annual locked-out overhauls. Assign daily cleaning to operators and locked-out adjustments to maintenance personnel.
What Belongs on Each Shift, Weekly, Monthly, and Annual Maintenance Tier?
Every shift starts with a brief pre-run walk-around and ends with nozzle purging, glue tank wiping, and optical sensor dusting. Weekly checks include belt tension, roller gap, and pneumatic filter. At each five-day operating milestone, technicians inspect bearings and belts, followed by 1-hour monthly and 2-hour quarterly mechanical and electrical audits.
Generic maintenance checklists often fail on the shop floor because they mix daily wipe-downs with complex mechanical adjustments. When a checklist doesn’t define ownership for each task, operators either skip daily maintenance tasks or perform unguarded roller adjustments without locking out the power supply. According to Caddis Systems’ industrial machine preventive maintenance benchmarks, daily operator checks take about 10 minutes and weekly checks take 30 minutes. In the same benchmark study, monthly audits take 1 hour and quarterly inspections take 2 hours.
In the commissioning audits that we’ve done in the corrugated and folding carton plants, separating operator care tasks from those of a technician maintenance routines, prevents the majority of shift start delays. Use the Shift-to-Annual Folder Gluer Preventive Maintenance Matrix below to give clear ownership, the required energy isolation state and measurable pass criteria for your folder gluer machines.
| Interval & Duration | Target Machine Section | Maintenance Procedures & Inspection Task | Owner & Energy State | Measurable Pass Criterion |
|---|---|---|---|---|
| Shift Pre-Start (~10 min) | All Guarded Stations & Air Supply | Test emergency stop button, verify safety guards, check 6 bar air gauge, and clear foreign tools from conveyor belts. | Operator (Energized Idle / Jog Test) | Instant drive halt on E-stop; 6 bar steady compressed air pressure. |
| Shift End (~10 min) | Gluing Section & Glue Tank | Purge cold-glue nozzles with warm water, apply wet caps, or set hot-melt tank to thermal standby; wipe excess glue. | Operator (Stopped / Guarded Access) | Zero dried glue on nozzle tips or wheel doctor blades; clean glue seam. |
| Daily (~10 min) | Feeding Section & Optical Sensors | Vacuum loose paper dust with a soft brush; wipe photocells and Baumer glue detectors with a dry lint-free cloth. | Operator (Stopped / Zero Motion) | 25 ± 5 mm sensor window clear; zero false counter or ejector trips. |
| Daily (~10 min) | Feeder & Folding Belts | Wipe glue residue and clay coating dust from belt surface using a damp cloth and mild neutral soap. | Operator (OSHA 1910.147 Lockout) | Matte elastomer grip restored; zero slip marks on carton blanks. |
| Weekly (~30 min) | Vacuum Pump & Pneumatic FRL | Blow out vacuum feeder intake filter cartridges, drain moisture from FRL bowls, and inspect pneumatic hoses. | Technician (OSHA 1910.147 + Air Bleed) | Dry FRL bowl; zero audible air leaks at 6 bar (10 m³/h rating). |
| Every 120 Hours | Bearings, Rollers & Carrier Belts | Check the tension on feeder and folding belts, inspect roller bearings per BOBST schedule, and check pulley alignment. | Technician (OSHA 1910.147 Lockout) | Matched left/right belt deflection per OEM manual; bearing housing cool. |
| Monthly (~1 hour) | Drive Chains & Carrier Lead Screws | Dry-clean paper dust from transverse lead screws and linear guides before applying fresh grease; lubricate drive chains. | Technician (OSHA 1910.147 Lockout) | Smooth motorized carrier movement across 290–1,650 mm width without servo overload. |
| Every 500 Hours | Hot-Melt Adhesive Tank & Hoses | Replace inline hot-melt filter screens, inspect nozzle orifices for wear, and remove carbonized char with brass tools. | Technician (Thermal PPE + Lockout) | Clean filter mesh; consistent adhesive bead weight and glue temperature. |
| Quarterly (~2 hours) | Electrical Cabinet & Folding Modules | Replace servo cabinet cooling fan filter mats, audit VFD thermal logs, and overhaul crash-lock and 4/6-corner hook spring assemblies. | Technician (Full Electrical Lockout) | Zero thermal error codes on 13.5–25.5 kW (CW-G) and 22–25 kW (CW-W) drives. |
| Annual Overhaul | Full Frame, Gearbox & Safety PLC | Laser-level machine modules, drain gearbox oil, replace worn belt pairs, back up PLC memory, and audit guard interlocks. | Technician / OEM Engineer (Full LOTO) | Frame level and roller gap within OEM spec; full fiber-tear joint bond. |
Sources: Caddis Systems PM checklist benchmarks, BOBST bearing/belt interval, Applied Adhesives 500-hour filter rule, and OSHA 29 CFR 1910.147.
Let’s say a single-shift folding carton plant operates 40 hours weekly across 15 production shifts in a 3-week cycle. Based on the published daily, weekly, and bearing inspection intervals, operators perform 150 minutes of daily care across the 15 shifts. Additionally, technicians perform 90 minutes of care across three weekly checks, plus one 60-minute bearing and belt audit. This adds up to 300 minutes (5.0 hours) of scheduled maintenance in a 3-week period. The scheduled durations of the checklists reflect baseline preventive inspections and don’t include unscheduled mechanical repair durations.
How Do You Clean, Tension, and Replace Folder Gluer Feeder and Carrier Belts?
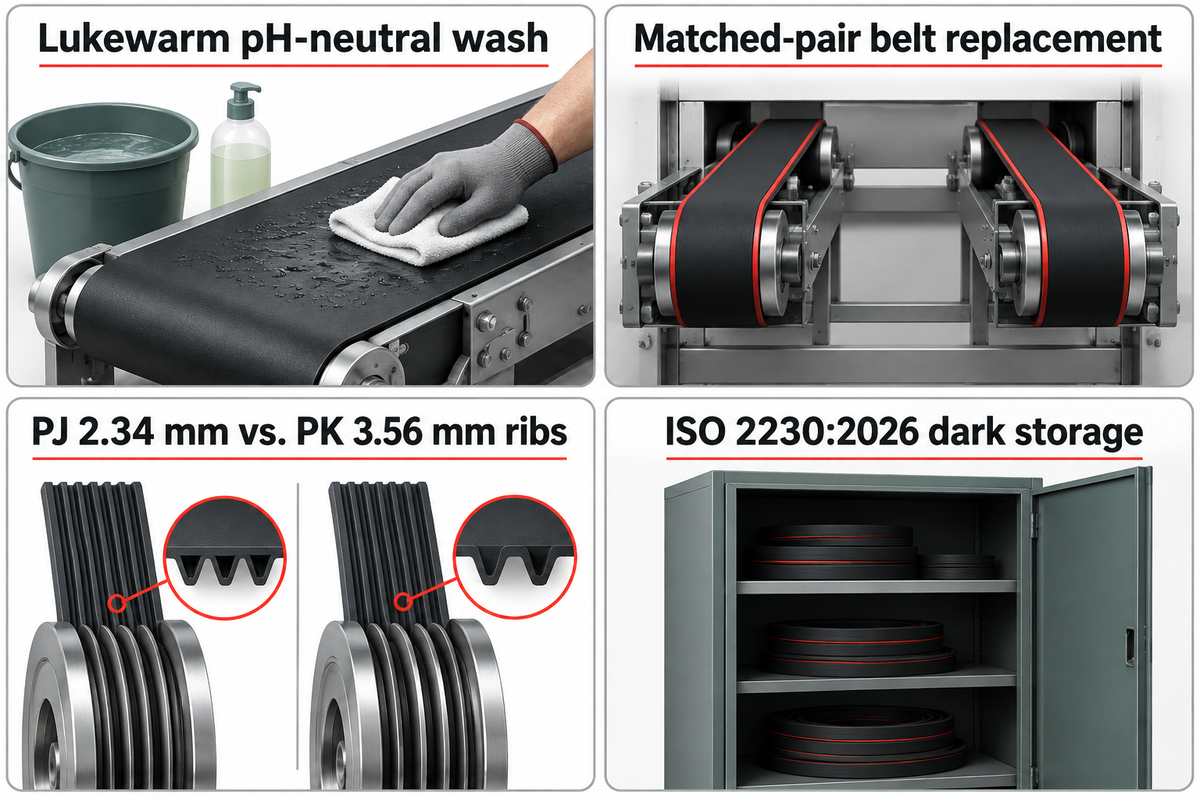
Clean feeder, folding, and compression belts daily with a damp cloth moistened with lukewarm water and a pH-neutral detergent, never harsh petroleum solvents. Replace the left and right carrier belts (as a matched pair) on the OEM schedule of wear and tension. Store spare rubber belts in a cool and dark place, per ISO 2230:2026.
Which Cleaning Agents and Tension Rules Protect Feeder and Carrier Belts?
Use lukewarm water and a mild pH-neutral soap to clean the high friction rubber feeder belts. Also use these solutions to clean the polyamide carrier belts and the cellular sponge compression belts. Avoid aromatic solvents, ketone thinners, or metal scrapers that swell or scar elastomer covers. Always match poly-V rib pitch (PJ 2.34 mm vs. PK 3.56 mm) and replace opposing belts together.
A folder gluer uses numerous families of belts to pull, crease, fold and compress board blanks. In the feeding section, perforated suction belts and feed rollers grip the bottom blank from the pile. During the pre-folding and folding sections, polyamide-core or polyurethane timing belts and fabric belting carry the carton at speeds of up to 400 m/min. These belting constructions are elaborated on in Packaging Digest’s Pack Expo machinery and Habasit belting report. At the delivery end, a soft cellular rubber apron belt maintains uniform pressure on the manufacturer’s joint.
Common Mistake #1: Over-Tensioning a Glazed Belt Instead of Cleaning the Elastomer Cover
When paper clay and glue residue polish a feeder belt surface, the belt slips because its friction coefficient has dropped, not because the belt is loose. Cranking down the take-up screw to stop slippage overloads the shaft bearings. As documented in carton folder gluer belt tensioning field analyses a bearing running under excessive radial load from an over-tensioned belt fails in weeks, rather than months.
Before ordering or installing replacement folder gluer belts, verify the belt core construction and rib profile. For main drive poly-V belts, check if the pulley grooves have a PJ profile (2.34 mm rib pitch) or a PK profile (3.56 mm rib pitch). PK and PJ belts are never interchangeable on the same pulley. You can cross-check model wear schedules in our folder gluer belt replacement interval guide.
| Belt Type & Machine Section | Core & Cover Material | Approved Cleaning Method | Prohibited Harsh Chemicals & Tools | Tension & Replacement Rule |
|---|---|---|---|---|
| Feeder Suction & Friction Belts | Carboxylated nitrile (XNBR) or natural rubber cover; Vacuum perforations. | Vacuum dust; wipe with lukewarm water and mild pH-neutral soap on a damp cloth. | Gasoline, ketone thinners, chlorinated solvents, wire brushes, or belt-dressing sprays. | Replace full feeder set together so pile pull speed stays symmetrical across all gates. |
| Pre-Folding & Folding Carrier Belts | Polyamide traction core or polyurethane timing belt with elastomer grip cover. | Warm water wipe while machine is locked out; lift softened PVA glue with plastic scraper. | Strong acids/alkalis, steel putty knives, or unguarded rag wiping while belts run. | Tension to OEM elongation percentage; always replace left and right carrier belts as a pair. |
| Poly-V Main & Section Drive Belts | Molded longitudinal rib belt (PJ or PK rib profile). | Dry soft brush to clear paper dust from pulley grooves; keep free of oil mist. | Lubricant overspray, liquid belt dressings, or mixing incompatible rib profiles on one pulley. | Verify pulley alignment with a steel straightedge; avoid bearing radial overload. |
| Compression & Delivery Apron Belts | Cellular sponge rubber or textured fabric conveyor belt. | Lightly dampened lint-free cloth to clean the conveyor; prevent water saturation of foam pores. | High-pressure water jets, solvent soaking, or sharp metal blades that tear cellular foam. | Track centered on crown rollers; pair with 6 bar pneumatic compression cylinder checks. |
| On-Site Spare Belt Inventory | Vulcanized or thermoplastic rubber spare belts in storeroom. | Inspect and record lot dates prior to circulation under ISO 2230:2026. | Direct sunlight, UV lamps, ozone-generating motors, tight folding creases, or damp floors. | Hang on wide-radius saddles or lay flat in dark packaging; rotate stock first-in, first-out. |
Sources: ISO 2230:2026 rubber storage standard, Packaging Digest belting report, and Sinosun PJ/PK belt engineering guide. Sinosun’s PJ/PK belt engineering manual describes the various types of belts.
As much care needs to be taken in the storage of spare belts as it does in the cleaning of spare belts. Published in March 2026, ISO 2230:2026 defines inspection, recording, packaging, and storage procedures for vulcanized and thermoplastic rubber components before they enter service. Storage should be done in the dark, in a cool and dry place.
How Should Operators Maintain Cold-Glue Extrusion Guns and Hot-Melt Adhesive Pots?
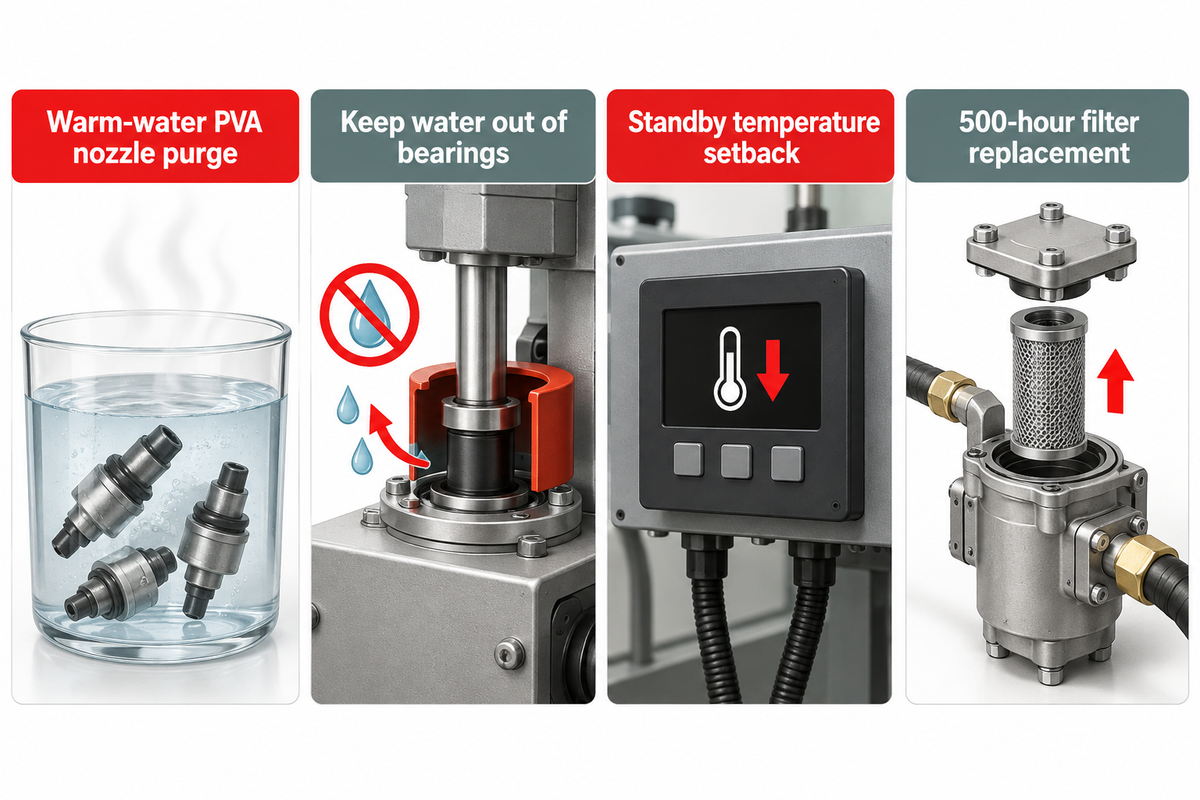
Belts on feeders and carriers should be cleaned daily with warm water. Adhesive stations should be purged based on the type of adhesive used. At the end of the shift, PVA should be flushed from the extrusion system and the nozzles should be cleaned. Idling hot-melt adhesive tanks should be set back to the thermal set point and the wheels should be scraped.
Cold-Glue Extrusion vs. Hot-Melt Pots: How Do Daily Purge Routines Differ?
Cold-glue PVA emulsion cures when water evaporates, so daily care centers on warm-water purging, wet nozzle capping, and keeping water out of lower glue-pot shaft bearings. Hot-melt adhesives solidify by cooling and thermally oxidize and degrade. It demands standby temperature setback, scheduled filter replacement and swaps, and dry non-metallic Char removal.
Wrong cleaning routines ruin valves and pumps in your gluing system in a few days. Cold-glue extrusion guns and lower glue wheels dispense water-based polyvinyl acetate (PVA) dispersion adhesive. Once air contacts stagnant PVA on a nozzle tip, water evaporates and forms a hard skin that deflects the glue stream. Never use steel needles or uncalibrated thin wire that scratches the seat to clear clogged precision orifices; soak removable tips in warm water to remove the glue safely. You can compare applicator hardware in our folder gluer glue system guide.
The chemistry at play with hot-melt tanks and hoses is opposite of one another. Imagine a hot-melt tank like a cast iron skillet left on high heat. While adhesive sits stagnant and at full application temperature during long changeovers, the polymer starts to break down and oxidize. As Henkel Adhesives’ technical guidance on preventing hot-melt char explains, establishing a temperature setback (standby) routine during idle windows prevents thermal degradation and nozzle blockages. On the other hand, Applied Adhesive’s hot-melt preventative maintenance method states that during idle times, a check for char buildup and replacement of inline filters is needed after every 500 hours of operation.
| Maintenance Dimension | Cold-Glue Electronic Extrusion Gun (PVA) | Lower Cold-Glue Wheel Pot (PVA) | Hot-Melt Tank, Hose & Jet/Wheel Unit |
|---|---|---|---|
| Primary Curing & Fouling Mechanism | Water evaporation cures PVA emulsion inside micro-orifices. | Air exposure thickens open reservoir glue and mixes with paper dust. | Prolonged heat oxidizes polymer into black carbonized char particles. |
| Short Stop Action | Wipe nozzle tip with a damp cloth and place wet sponge cap over head. | Keep glue wheel slowly idling or cover reservoir to slow evaporation. | Engage thermal setback / standby mode to drop glue temperature. |
| Shift-End Shutdown Routine | Flush manifold and glue nozzles with warm water; verify clean spray pattern. | Drain remaining glue into sealed container; wash wheel and scraper in warm water. | Wipe exterior nozzle char while warm; power down heaters per sequence. |
| Approved Cleaning Tools | Warm water, lint-free cloth, ultrasonic bath for removable nozzle tips. | Warm water, soft brush, and non-marring plastic scraper on knurled wheel. | Brass brush, wooden/PTFE scraper, and OEM flushing wax/fluid. |
| Prohibited Actions | Poking valve seats with steel wire or mixing incompatible adhesive chemistries. | Submerging shaft bearings in water or scraping chrome wheels with steel blades. | Introducing water into heated glue tank or leaving tank at full heat idle. |
| Inline Filter Service | Rinse stainless suction and manifold strainer screens weekly in warm water. | Skim paper fiber skins daily; strain recycled PVA before refilling pot. | Inspect tank screen weekly; replace inline hose/gun filter on the 500-hour schedule. |
| Metering & Seal Inspection | Verify pneumatic regulator pressure and solenoid response time weekly. | Check doctor-blade scraper gap and inspect shaft lip seals for glue seepage. | Inspect heated hose couplings and RTD temperature sensors for drift. |
| Optical Glue Monitoring | Wipe Baumer GDX 1000 sensor lens daily; keep within calibrated working distance. | Verify glue line width on test blank before engaging high-speed run. | Clean infrared/UV bead detector window daily with a dry microfiber cloth. |
| Food-Packaging Sanitation | Prevent microbial slime in water flush lines; use 21 CFR 175.105 adhesives. | Sanitize drained glue pots weekly; keep non-food lubricants away from wheel. | Keep tank lid closed so airborne dust and charred flakes cannot contaminate glue. |
Sources: Henkel hot-melt char prevention guide, Applied Adhesives filter maintenance protocol, Baumer hhs sensor specs, and US FDA 21 CFR 175.105.
When converting food, beverage, or pharmaceutical cartons, glue application hygiene carries regulatory weight. Under U.S. FDA 21 CFR 175.105 (Indirect Food Additives: Adhesives), packaging adhesives must be formulated and applied under conditions that prevent unsafe migration across the carton seam. Keeping glue tanks covered and flushing cold-glue manifolds prevents bacterial biofilms and charred debris from entering food-packaging joints.
Which Lubrication Intervals Protect Folder Gluer Bearings, Gearboxes, and Lead Screws?
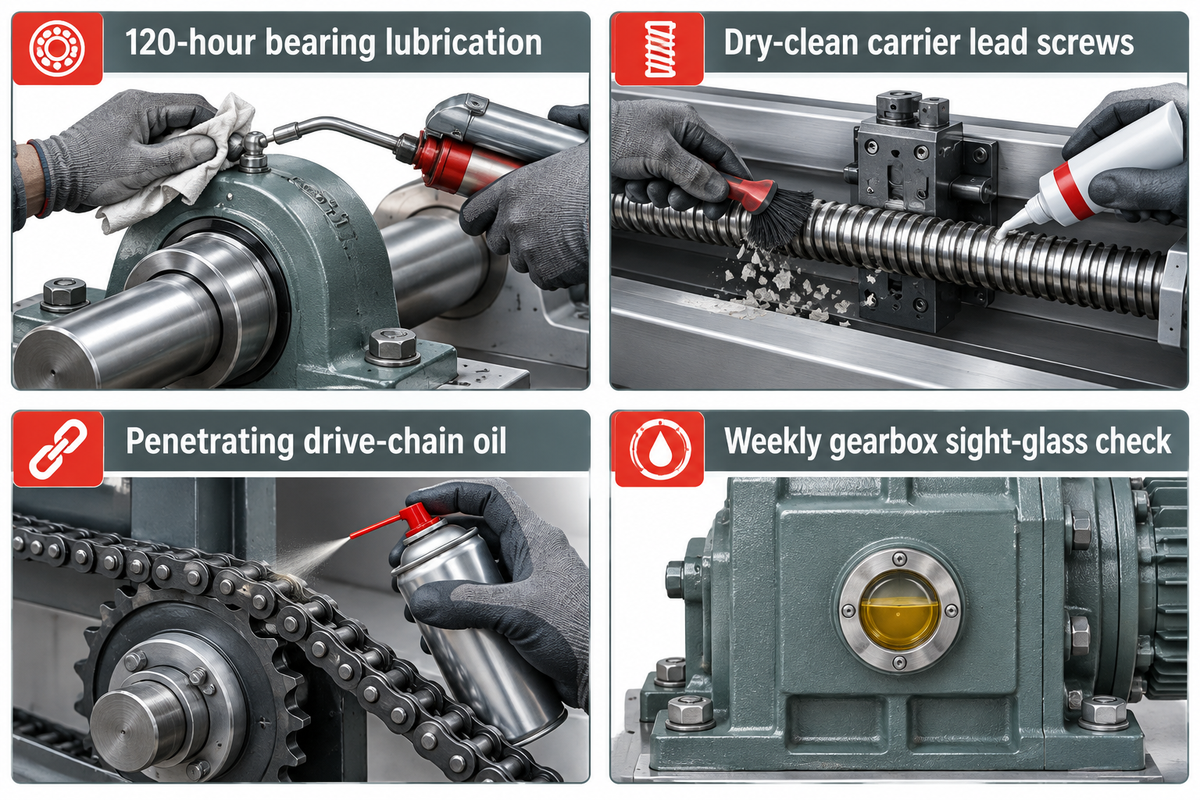
Inspect and lubricate main roller bearings every 120 hours of operation and service drive chains and transverse carrier lead screws monthly. Always dry-clean accumulated paper dust from screw threads before applying grease. Select NSF H1 food-grade lubricants where cartons come in contact with food or pharmaceutical lines.
How Do You Lubricate Drive Chains and Lead Screws Without Trapping Paper Dust?
Vacuum and brush away fibers on motorized lead screws, linear guides, and drive chains before lubricating. Dust and dirt attract moisture. Pumping lubricants directly over dusty screw threads creates an abrasive grinding paste which scores brass carrier nuts and trips overload alarms on servos during width changeovers.
High-speed folder gluers consist of hundreds of moving parts, which include feeder cam followers, creasing shafts, folding roller bearings, cardan universal joints and transverse frame lead screws. Keeping these assemblies in good condition requires pairing the right lubricant intervals with strict dust removal.
“It is essential to regularly perform proper maintenance on the bearings, following the cleaning and lubrication manuals developed by BOBST, and to inspect belts every 120 hours of operation.”
Common Mistake #2: Adding Fresh Grease to Uncleaned Carrier Lead Screws
Transverse lead screws that move the left and right carriers across a 290 to 1,650 mm frame sit directly beneath the board path. The lead screws bind and create an abrasive paste which scores the brass carrier nuts and stalls the automatic width changeover.
Follow four zone rules during your bearing and lubrication routines to extend component lifespan and maintain smooth operation:
- Before attaching the grease gun, wipe grease fittings clean on serviceable roller bearings at scheduled intervals. Don’t over-pack high-speed bearings. Extra grease can clog bearing raceways. Clogged raceways can lead to increased friction and temperature. This can cause weeping around the seals and contaminate nearby conveyor belts.
- Wipe old, dark grease from lead screws and linear bearings monthly with a lint-free cloth and re-lubricate with lithium or synthetic PTFE grease. Jog carriers across their full travel stroke to evenly distribute grease and wipe away grease pushed to the stroke ends.
- Inspect main drive chain sag and sprocket wear patterns every month. Use a penetrating chain oil, rather than a thick grease, for the pin and bushing joints, to avoid trapping airborne carton fibers.
- Weekly checks should be done on levels of sight-glass oils for main gearboxes for machines with centralized lubrication pumps. Drainage and refilling of main gearboxes should be done during overhauls with oils of the OEM recommended viscosity.
How Do You Prevent Paper Dust and Heat from Damaging Folder Gluer Sensors and Servo Drives?
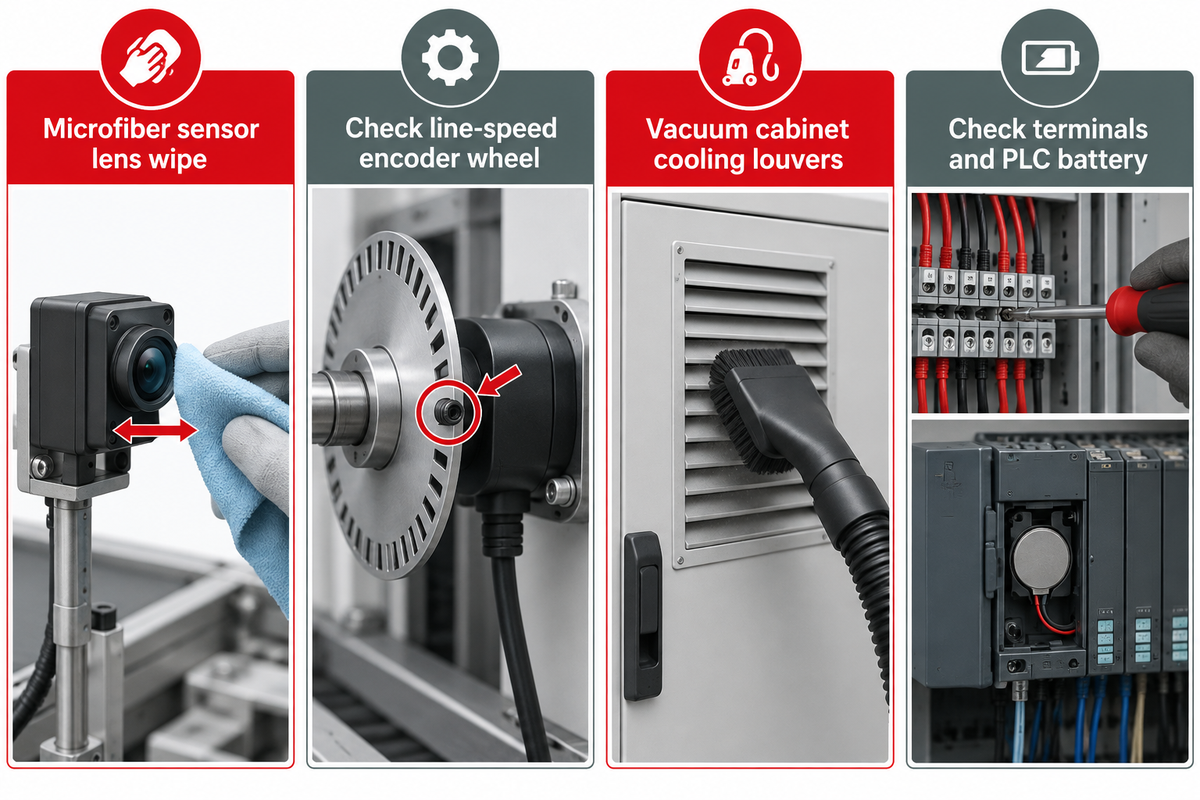
Clean optical photocells and cold-glue detectors with a dry microfiber cloth daily. Daily lens cleaning preserves the 25 ± 5 mm sensor-to-product distanceand 1 × 1 mm dot detection at 20 kHz of sensors like the Baumer hhs GDX 1000. Vacuum the electrical cabinet intake filters weekly to prevent servo drives from thermal trips.
How Do You Keep Optical Photocells, Glue Detectors, and Servo Cabinets Clean?
Clean feed-gate photocells, glue registration eyes and delivery counter sensors every shift with a soft brush and a dry, lint-free cloth. Inspect rotary encoder couplings monthly, and vacuum or replace electrical cabinet cooling fan filter mats weekly to prevent variable-frequency drives (VFDs) and multi-axis servo amplifiers from overheating.
Paper dust and glue mist are the main causes of intermittent electrical failures on modern converting lines. Registration of high-speed folder gluer speed depends on the firing of optical sensors within microseconds. Dried glue mist or paper dust can obstruct the optical window of a cold-glue detector. If a knocked bracket also shifts the sensor outside its calibrated standoff range, the controller triggers false reject alarms.
Heat buildup inside the main control cabinet poses an equal risk to machine performance. Cenwan’s CW-G series uses 13.5 kW on CW-G-650PC and 21.5–25.5 kW on larger models, while the CW-W servo series uses 22–25 kW. Those synchronous servo drives and VFDs generate continuous cabinet heat. When airborne corrugated fiber clogs the cabinet cooling fan louvers, internal temperatures rise until drives throw over-temperature error codes and halt the line mid-run.
Perform the following four checks to protect your optical and electrical architecture:
- Lint and dust the feeders, glue trigger, and counter ejector photocells at the end of your shift. For the glue trigger and counter ejectors, open and close the blade a few times to remove dust. For the servo cabinets, make sure cooling fans spin freely and cabinet doors stay latched and sealed. Blow out vacuum feeder intake cartridges on a weekly schedule. Use a microfiber towel to clean the lenses of the photocells. Never spray solvent glass cleaners on plastic fiber-optic lenses.
- Check the encoder on the main line speed weekly. A loose encoder grub screw or glue coating on the measuring wheel causes the glue lines to shorten or shift as belt speed accelerates from jog to 400 m/min.
- Vacuum or wash and completely dry louvers every week. Verify cooling fans are free to spin while the cabinet doors are sealed.
- During a full annual electrical lockout, check power supply terminal torque for vibration loosening and replace PLC backup batteries on the OEM calendar so stored box recipes are never lost.
How Do You Maintain Folder Gluer Vacuum Pumps and Pneumatic Air Preparation Units?
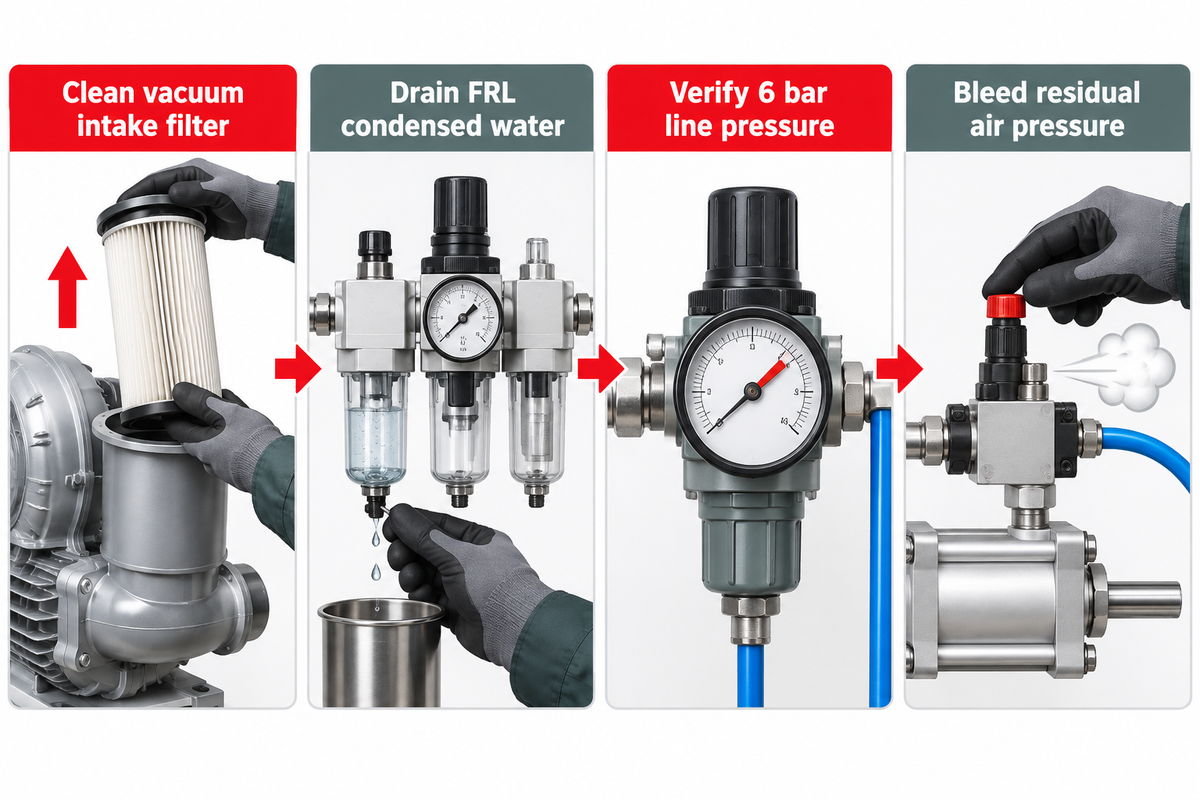
Keep stable 6 bar (0.6 MPa) compressed air and 10 m³/h flow (Cenwan CW-G/CW-W pneumatic rating) by draining Filter-Regulator-Lubricator (FRL) water traps and blowing out vacuum feeder intake cartridges weekly. Bleed off residual pneumatic pressure, under OSHA 29 CFR 1910.147 (d) (5), before servicing cylinders.
What Weekly Checks Prevent Vacuum Feeder Loss and Pneumatic Cylinder Leaks?
Each week, remove and clean the intake filter cartridge in the vacuum blower of the feeding section. Also drain condensed water from the FRL air preparation unit. Check that regulated line pressure holds steady at 6 bar and listen for air leaks across pneumatic compression cylinders and batch-counter kicker solenoids.
A well-maintained pneumatic and vacuum circuit keeps both ends of a folder gluer synchronized. At the infeed, a high-flow regenerator blower pulls vacuum through perforated feeders belts to separate the bottom blank from the pile without double-feeding. At the delivery end, pneumatic cylinders pressurize a compression conveyor and a batch-counter kicker. High speed flippers are also actuated. Cenwan’s published CW-G and CW-W specifications rate this pneumatic circuit at 6 bar working pressure and 10 m³/h air consumption.
Corrugated board and recycled carton stock shed a good deal of paper dust. As a result, the intake filter of the vacuum blower gets clogged rather quickly. A restricted intake filter cartridge starves the blower of air, reduces the suction hold-down force on warped blanks, and increases the bearings’ temperature. Incorporate daily cleaning of feeder dust bags with regular cleaning of intake cartridges across these various parts of the machine.
Same is true for controlling moisture in compressed air. Water droplets that bypass a full FRL moisture trap, wash away factory cylinder grease, corrode solenoid spools on glue guns and kickers and cause uneven compression apron pressure. During weekly checks, drain the FRL water bowl and inspect quick-connect polyurethane air tubing for chafing against moving frame members.
How Does Maintenance Differ Between Corrugated Box and Folding Carton Folder Gluers?
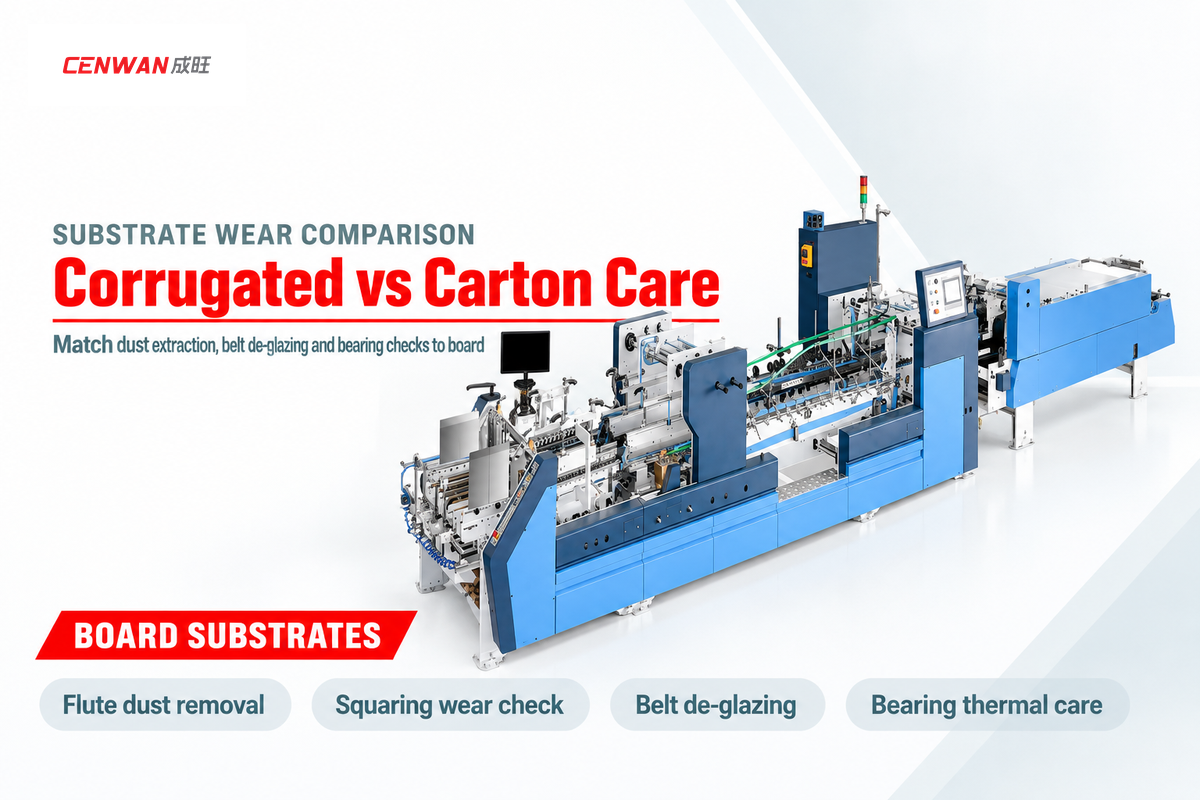
Corrugated folder gluers running E, F, C, B, and AB flute board require heavy flute-dust extraction and squaring-plate wear checks. This class includes the 22 kW, 200 m/min Cenwan CW-W-1250AC-S. Folding carton lines running 200-800 g/m2 paperboard at up to 400 m/min (CW-G series) prioritize high-speed bearing thermal control and fine optical glue monitoring.
Corrugated Flute Dust vs. High-Speed Carton Lines: Where Does Wear Concentrate?
On corrugated board lines (290-1,650 mm width, 180-200 m/min), coarse unbleached kraft fibers and slitter dust wear down feeder gates, squaring plates, and motorized lead screws. On paperboard folding carton lines (200–800 g/m², up to 400 m/min), clay coating powder glazes belts and high rotational speeds stress bearings and 4/6-corner servo hooks.
Plant managers producing both corrugated fiberboard cases and paperboard cartons can’t use the same uniform cleaning cadence. The physical mass, surface chemistry, and linear belt speed of the substrate dictate where mechanical wear concentrates across your folder gluers.
The heavy-duty CW-W-1250AC-S weighs 8,000 kg and uses a 22 kW motor across widths up to 1,250 mm. The 4/6 corner CW-W-1250PCW model, with a 25 kW motor, runs at 180 m/min up to 1,650 mm. The CW-G series uses a 13.5 kW motor on the CW-G-650PC and 21.5 to 25.5 kW motors on larger models, running 200 to 800 g/m² cardboard at up to 400 m/min.
| Operating Parameter & Wear Zone | Corrugated Box Folder Gluer (CW-W Series Baseline) | Folding Carton Folder Gluer (CW-G Series Baseline) |
|---|---|---|
| Substrate & Speed Envelope | E, F, C, B, and AB flute corrugated board; 290–1,650 mm width; 180–200 m/min max speed; 22–25 kW drive; 8,000 kg frame. | 200–800 g/m² coated/uncoated paperboard; up to 400 m/min max speed; 13.5–25.5 kW drive; 6,400–7,800 kg frame. |
| Dominant Dust & Contamination | Coarse recycled kraft fibers, starch adhesive flakes, and die-cut slitter chaff packing into lower carrier tracks. | Fine kaolin clay/calcium carbonate coating powder, UV varnish dust, and fine ink offset buildup on belts and sensors. |
| Feeder & Pre-Folding Wear Point | High vacuum blower filter loading; abrasive grooving on feed gates, pre-break swords, and upper/lower guide plates. | Rapid glazing of feeder friction belts from clay coating; precision score-breaker knife edge polishing. |
| Roller Gap & Nip Calibration | Must calibrate roller gap to flute caliper without crushing flutes. | Tight sub-millimeter nip clearances to crease 180° first folds and 165° third folds on springy paperboard. |
| Squaring & 4/6-Corner Mechanism Care | Check dual-stage squaring plates and heavy crash-lock hooks weekly; perform full spring assembly overhaul quarterly. | Inspect high-speed rotary servo back-folding hooks and timing belts at each bearing service interval; overhaul quarterly. |
| Adhesive & Compression Demands | Higher glue coat weight + optional hot-melt tack to hold heavy fluted flaps closed entering 6 bar pneumatic compression. | Micro-dot cold-glue extrusion monitoring and UV/plasma surface-treater electrode cleaning. |
Sources: Cenwan CW-W and CW-G Technical catalogs and Baumer hhs sensors.
How Do You Troubleshoot Folder Gluer Jams, Blank Skewing, and Fishtailing?
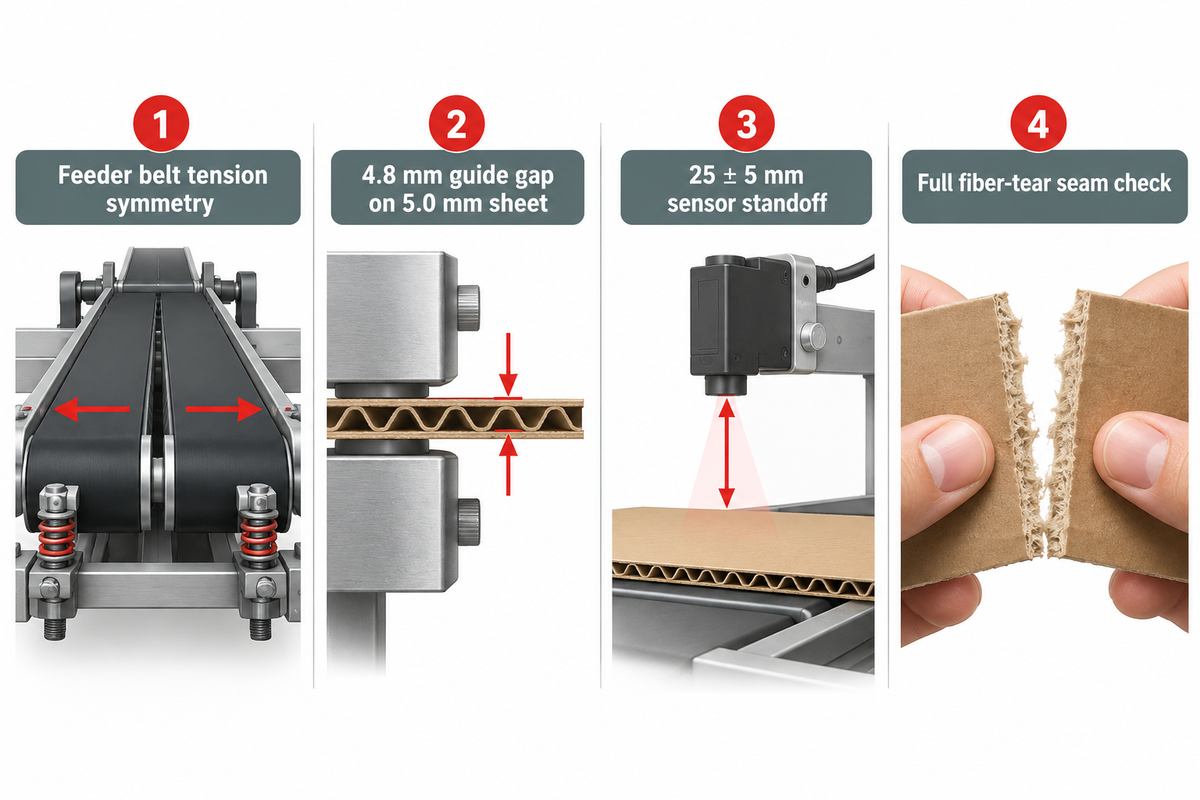
Check for wear on components prior to making any changes to setup positions to identify blank skewing, fishtailing, crease cracking, and glue pop-opens. Verify the symmetry of left to right feeder belt speed and tension, check the upper and lower guide plate gaps, and ensure there’s a full fiber-tear across the cured seam.
Which Worn Components Cause Blank Skewing, Fishtailing, and Glue Pop-Opens?
A slipping feeder belt or a glazed feeder belt causes asymmetry and tensions inconsistencies on the carriers, resulting in blank skewing. Corrugated fishtailing is caused by excess clearance on the guiding plates or worn squaring plates. Unbroken score lines cause uneven folds and liner cracking. Open glue seams are caused by low compression, clogged glue nozzles, or encoder slip.
When finished boxes exit the delivery conveyor with fishtailed joints or skewed flaps, operators often react by moving folding swords and side guides, which throws the whole setup out of square. Always check the baseline machine geometry using our folder gluer setup checklist alongside the Defect-to-Component Root-Cause Diagnostic Matrix below.
Consider the mechanical guide-clearance physics documented in U.S. Patent US8512803B2 (Folder Gluer and Method for Manufacturing Corrugated Box). When the thickness of a corrugated sheet S is 5.0 mm, the narrowest gap between the upper and lower guide plates is set to 4.8 mm. An air cylinder simultaneously counterbalances the contact glue gun’s weight. Abrasive flute wear or loose mounting bolts can widen that 4.8 mm guide gap beyond the 5.0 mm sheet thickness, causing the blank to skew beneath the glue head. Similarly, if a Baumer GDX 1000 detector shifts outside its 25 ± 5 mm working distance, it misses 1 × 1 mm adhesive dots. Both published tolerances illustrate component-specific diagnostic checks rather than universal settings for every flute profile.
| Observed Carton Defect / Breakdown | Suspect Machine Station | Primary Maintenance / Wear Root Cause | Quick Shop-Floor Verification Check | Corrective Maintenance Action |
|---|---|---|---|---|
| 1. Intermittent Double-Feeds or Misfeeds | Feeding Section | Glazed rubber feeder belts, worn feed-gate tip, or clogged vacuum blower filter. | Check vacuum gauge drop and inspect feeder belt surface for glossy clay buildup. | Wipe feeder belts with lukewarm water and mild soap; clean vacuum filter cartridge; set gate gap to single-blank caliper. |
| 2. Blank Skewing Entering Pre-Folder | Feeder / Infeed Rails | Unmatched left/right belt wear (mixing one new and one old belt) or uneven belt tension. | Measure left vs. right belt deflection and check infeed rail parallelism with a steel straightedge. | Replace feeder or carrier belts in matched pairs; equalize left/right tension screws. |
| 3. Corrugated Fishtailing (Uneven Joint Taper) | Folding & Squaring Section | Misaligned belts, worn upper/lower guide plates, or uneven carrier roller gap across flute thickness. | Measure top-to-bottom joint gap with a straightedge; check guide gap with feeler gauge (e.g., 4.8 mm on 5.0 mm board). | Re-level upper carrier rail, clean and grease lead screws, and calibrate squaring section timing. |
| 4. Uneven Folds or Score-Line Liner Cracking | Pre-Folding Section | Insufficient 180° first-crease pre-break angle, grooved pre-fold rollers, or dry brittle board. | Jog a single blank through pre-folder and verify full 180° crease break and 165° third-crease break. | Remove dried glue from pre-folding swords and rollers; reset nip roller gap to board gsm/flute caliper. |
| 5. Glue Seam Pop-Opens at Delivery Exit | Gluing & Compression Sections | Partially blocked glue nozzles, charred hot-melt filter, or compression pressure below 6 bar. | Pull cured joint apart to verify full fiber tear; check FRL air gauge (6 bar) and glue temperature. | Warm-water purge PVA gun or swap inline hot-melt filter; bleed water from FRL and restore compression apron pressure. |
| 6. Glue Line Drifts Forward/Back With Speed | Gluing Trigger & Encoder | Loose rotary encoder coupling, glue-fouled encoder wheel, or dusty trigger photocell lens. | Compare glue line start position at slow jog vs. high production speed; inspect encoder shaft grub screws. | Tighten encoder coupling, clean measuring wheel rim, and wipe optical trigger sensor with a dry lint-free cloth. |
| 7. Crash-Lock Bottom Flaps Jam or Miss Hook | Crash-Lock / 4-6 Corner Module | Fatigued bottom-hook return spring, glue buildup on hook finger, or servo back-folding phase drift. | Under LOTO, manually test hook spring snap-back and inspect hook tip for dried adhesive buildup. | Clean hook fingers with warm water and plastic scraper; replace weak springs from Tier-1 spare kit. |
| 8. False Glue-Missing Ejector Rejects | Optical Quality Inspection | Dusty cold-glue detector lens or sensor bracket shifted outside calibrated detection window. | Measure sensor-to-sheet gap with a scale and inspect lens face for adhesive mist. | Wipe sensor window with dry microfiber cloth and lock mounting bracket at calibrated standoff above glue flap. |
| 9. Printed Carton Surface Scuffing or Marks | Carrier & Transfer Rollers | Hardened dried glue lumps on folding belts, seized idler roller bearing, or over-tight nip rollers. | Under LOTO, spin all idler rollers by hand and inspect belt surface along the scuff track line. | Remove glue lumps with warm water and plastic tool; replace rough idler bearings; equalize roller gap. |
Sources: the joint test standards (TAPPI T 840 om-10 and T 813), USPTO patent US8512803B2, Baumer hhs sensor specifications, and Sinosun belt diagnostics.
What Safety Lockout Procedures and Critical Spare Parts Support Annual Folder Gluer Overhauls?
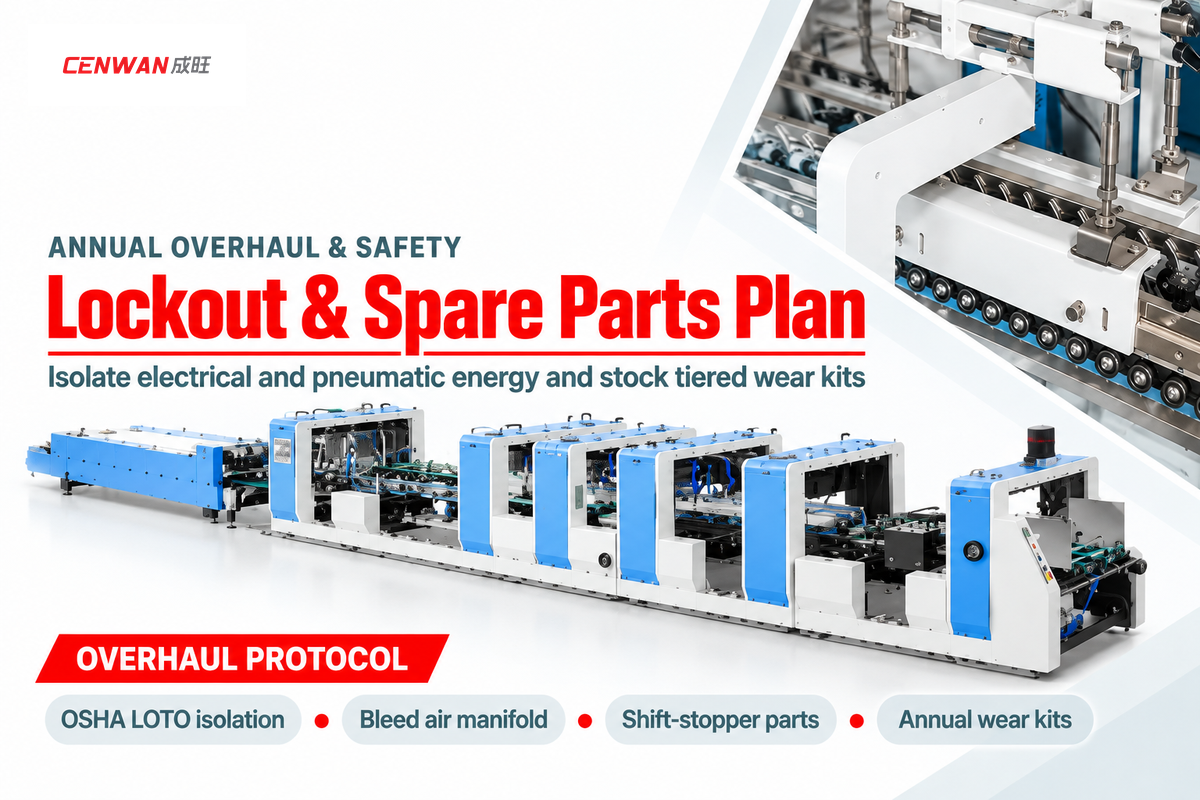
Every internal maintenance task requires full energy isolation and stored-energy relief under OSHA 29 CFR 1910.147, never reliance on an emergency stop button alone. Along with lockout compliance, keep a 3-tiered spare parts inventory (Shift-Stoppers, Scheduled Wear Parts, and Annual Overhaul Assemblies) sourced through our folder gluer parts and service support.
How Do You Lock Out Stored Energy (OSHA 1910.147) and Stock Critical Wear Parts?
Before reaching into nip points, disconnect and padlock the main electrical isolator and bleed compressed air from the 6 bar pneumatic manifold. Allow VFD capacitors and hot-melt heaters to discharge and cool, then test the start buttons to verify no residual energy is stored. Stock Tier 1 shift-stopper parts on the shop floor to prevent freight delays.
Pressing an emergency stop button or opening an interlocked guard door breaks the control circuit but doesn’t isolate main power or vent trapped air pressure. When technicians unjam cartons, scrape glue rollers, or tension belts inside nip zones, they must execute a formal Lockout/Tagout (LOTO) procedure under U.S. OSHA 29 CFR 1910.147. In European plants, guard interlocks and power isolation architecture align with CE Directive 2006/42/EC and EN 415-10 packaging machinery standards.
“Following the application of lockout or tagout devices to energy isolating devices, all potentially hazardous stored or residual energy shall be relieved, disconnected, restrained, and otherwise rendered safe.”
During annual overhauls, plant managers also ask whether replacing worn belts, bearings, or drives triggers a new machinery conformity certification. As per the UK Health and Safety Executive (HSE) guidance on refurbished and modified machinery replacing worn parts by new, similar parts (like-for-like replacement) wouldn’t require re-marking. Replacement of a machinery control with a different control or speed limiter with a higher speed would require a new conformity assessment.
Annual maintenance and wear-parts replacement budgets are a function of the width class of the machine model (650 to 1,650 mm maximum width, accommodating 290 to 1,650 mm blanks). Daily shift count, board abrasiveness, and local labor rates also impact these budgets, and therefore, quotes should be requested for the serials of the machines in the plant. To avoid days of downtime waiting for air-freighted parts when a wear part fails, structure the on-site storeroom according to the 3-tier spare-parts stocking table below.
| Inventory / Audit Tier | Specific Folder Gluer Components | Recommended On-Site Stock Quantity | Storage & Verification Requirement |
|---|---|---|---|
| Tier 1: Immediate Shift-Stoppers | Cold-glue nozzle tips and seals, hot-melt inline filters, crash-lock bottom hooks and return springs, feed-gate tips, and photocell eyes. | 2–4 complete sets per machine line kept in the line-side maintenance cabinet. | Keep nozzles and optical sensors in sealed dust-free trays for rapid swap under LOTO. |
| Tier 2: Scheduled Wear Parts | Matched feeder suction belt sets, left/right polyamide carrier belt pairs, PJ or PK poly-V drive belts, vacuum blower filters, and FRL elements. | 1 full matched machine set per width class (650PC, 1100PC, or 1250AC-S). | Store rubber and elastomer belts uncreased in cool, dark packaging per ISO 2230:2026; record batch dates. |
| Tier 3: Annual Overhaul & Drive Assemblies | High-speed roller bearings, brass carrier lead-screw nuts, rotary speed encoders, pneumatic kicker solenoid valves, and cabinet cooling fans. | Stock 1–2 critical spares on-site or confirm 48-hour express dispatch from OEM parts hub. | Verify bearing clearances and encoder pulse ratings against the original equipment serial BOM. |
| OEM Audit 1: Off-the-Shelf Subcomponents | PLC controllers, servo drives, contactors, pneumatic valves, and bearings across BOBST, Heidelberg, Signature folder gluer (AIM), and Cenwan lines. | Audit electrical and mechanical BOM before machine purchase. | Confirm globally sourced standard industrial brands so local technicians can source parts without proprietary lock-in. |
| OEM Audit 2: Mechanical Service Accessibility | Outboard bearing housings, quick-release belt tensioners, and open transverse carrier lead screws. | Inspect frame geometry during Factory Acceptance Test (FAT). | Confirm technicians can clean lead screws and swap feeder belts quickly without dismantling main side frames. |
| OEM Audit 3: Remote PLC & Parts Support | Encrypted remote PLC diagnostic gateway, English electrical schematics, and serial-matched wear-parts kits. | Included in Cenwan folder gluer parts and service support. | Verify remote servo alarm diagnostics and guaranteed spare-parts compatibility by machine serial number. |
Scope note: Exact percentages of belt elongation, grades of bearing grease, doctor-blade clearances, and fastener torque values must follow the OEM’s Operation & Maintenance manual for your machine.
Order Serial-Matched Spare Parts or Schedule a Cenwan Technical Maintenance Audit
Need matched feeder and folding belts, crash-lock hook kits, or remote PLC servo diagnostics for your CW-G or CW-W folder gluer? Send our engineering team your machine serial number, unfolded blank dimensions, and shift schedule to receive a customized wear parts kit.
Frequently Asked Questions
How do you test and verify folder gluer folding accuracy after a major belt or roller replacement?
Run a 50-blank slow-speed jog trial followed by a production speed sample run on your tightest-tolerance carton dieline.
Measure folded flap alignment and manufacturer’s joint taper with a calibrated steel straightedge and confirm smooth crash-lock hook engagement. Pull apart cured sample seams and check for full fiber tear before releasing the folder gluer for full shift production.
What is the safest method for removing cured adhesive from folder gluer rollers and folding swords?
OSHA 29 CFR 1910.147 requires you to isolate and lock out all electrical and pneumatic energy before coming in contact with any roller or folding Sword.
Use warm water or a non-corrosive release agent approved by the adhesive manufacturer to soften water based PVA. Lift the softened residue with a plastic or brass scraper rather than steel blades or thin wire that score chrome rollers and knurled glue wheels.
Why must feeder suction belts and left/right carrier belts be replaced in matched pairs on a folder gluer?
Replace feeder and left/right carrier belts in matched pairs so both sides of the carton blank travel at identical linear speed and friction grip.
A new belt has a greater elastomer thickness and a higher surface friction coefficient compared to a worn belt which has experienced cord elongation and clay polishing. Pairing a new belt with a worn belt causes the blank edges to bind unevenly resulting in carton skewing.
What maintenance steps are required before shutting down a folder gluer for a winter holiday or multi-week idle period?
Drain and flush cold-glue tanks, pumps, hoses and extrusion valves with warm water to prevent residual PVA emulsion from freezing or curing in the lines.
Vacuum paper dust from all transverse lead screws and linear guides, and coat bare steel shafts with anti-corrosion oil. Drain compressed-air FRL water traps, relax belt tension if specified by the OEM manual, and verify PLC parameter backup before disconnecting main power.
Does replacing worn belts, bearings, or folding hooks count as a substantial machine modification under safety regulations?
Like-for-like replacement of worn belts, bearings, or folding hooks during routine refurbishment of a machine doesn’t constitute a substantial machine modification.
According to UK HSE machinery refurbishment guidance, if worn parts are replaced by identical or similar parts, re-certification isn’t required. By contrast, adding new powered stations, increasing the maximum design speed, or altering safety guard logic requires a formal conformity assessment.
How should a carton plant store spare rubber feeder belts and polyurethane carrier belts to prevent premature aging?
Spare rubber feeder belts and elastomer carrier belts should be stored uncreased in a cool, dry and dark cabinet according to ISO 2230:2026 guidelines.
Keep spare belts in protective opaque packaging away from direct sunlight, UV lighting, ozone-producing electric motors, and damp floors. Also, store them in a way to adhere to a first in, first out inventory control.
When should a converter schedule a professional OEM alignment audit instead of relying solely on in-house maintenance?
Schedule a professional OEM alignment audit when chronic blank skewing, main drive vibration, or servo following error alarms occur after standard belt replacement and lubrication.
Bring in OEM service engineers when you relocate a folder gluer on the plant floor. Multi-module frames require optical laser leveling and multi-axis servo phase calibration across the crash-lock and 4/6-corner stations before high-speed production resumes.
Why We Write This
We pair those factory benchmarks with OSHA 29 CFR 1910.147 lockout rules, ISO 2230:2026 rubber storage standards, and NIST maintenance data to help converters prevent downtime. Edited by the Zhejiang Chengwang Intelligent Packaging Equipment (Cenwan Machine) technical team.
References & Sources
- OSHA 29 CFR 1910.147: The Control of Hazardous Energy (Lockout/Tagout) & Stored Energy Relief U.S. Occupational Safety and Health Administration (OSHA)
- Maintenance Costs and Advanced Maintenance Techniques in Manufacturing Machinery: Survey and Analysis — National Institute of Standards and Technology (NIST)
- ISO 2230:2026 (Edition 3): Rubber Products, Guidelines for Storage, Inspection, and Recording U.S. International Organization for Standardization (ISO)
- 21 CFR 175.105: Indirect Food Additives, Adhesives for Food Packaging Components Electronic Code of Federal Regulations (eCFR / U.S. FDA)
- TAPPI T 840 om-10 & TAPPI T 813: Testing Adhesives and Tensile Strength in Glued Lap Joints of Corrugated Containers Technical Association of the Pulp and Paper Industry (TAPPI)
- Refurbished and Modified Machinery: Like-for-Like Replacement vs. Substantial Modification Guidance U.K. Health and Safety Executive (HSE)
- Care for Bearings and Belts that Boost Your Folding and Gluing Process (120-Hour Inspection Interval)
Bobst Group SA
- GDX 1000 Cold-Glue Sensor Specifications (25 ± 5 mm Working Distance, 1 × 1 mm Dot Detection at 20 kHz) Baumer hhs GmbH
- Preventing Hot Melt Adhesive Char Through Thermal Setback and Cleanliness
Henkel Adhesives Technologies
- Preventive Maintenance Guide for Hot Melt Adhesive Systems (500-Hour Filter Replacement)
Applied Adhesives
- Machine Preventive Maintenance Checklist: Daily, Weekly, Monthly, and Quarterly Duration Benchmarks — Caddis Systems
- U.S. Patent US8512803B2: Folder Gluer and Method for Manufacturing Corrugated Box (4.8 mm Guide Gap on 5.0 mm Sheet)
United States Patent and Trademark Office (USPTO)
- Pack Expo Packaging Technologies Report: Folder-Gluer Polyurethane Timing and Fabric Belting
Packaging Digest